magento 是 adobe 的一个流行的开源电子商务平台。它是用 php 编写的,并使用 mysql 或 mariadb 作为数据库后端。magento 是完全可定制的,以满足用户的要求,并允许他们在几分钟内创建和启动一个功能齐全的在线商店。
在 上
步骤 1. 首先,让我们先确保您的系统是最新的。
sudo dnf update
sudo dnf install epel-release
步骤 2. 安装 lamp 服务器。
需要一个 almalinux lamp 服务器。如果您没有安装 lamp,您可以在此处按照我们的指南进行操作。
步骤 3. 安装 composer。
在开始之前,您需要在服务器上安装 composer。您可以使用以下命令安装它:
curl -ss https://getcomposer.org/installer | php
mv composer.phar /usr/local/bin/composer
步骤 4. 在 almalinux 8 上安装 magento。
现在我们从官方页面下载 magento 安装程序:
cd /var/www/html/
wget https://github.com/magento/magento2/archive/2.3.zip
unzip 2.3.zip
mv magento2-2.3 magento2
接下来,使用以下命令更改目录并安装所有必需的 php 依赖项:
composer update
composer install
我们需要更改一些文件夹的权限:
chown -r apache:apache /var/www/html/magento2
chmod -r 755 /var/www/html/magento2
然后,运行以下命令来安装 magento:
cd /var/www/html/magento2/
bin/magento setup:install --admin-firstname="magento" --admin-lastname="admin" --admin-email="admin@example.com" --admin-user="admin" --admin-password="hitesh@1981" --db-name="magentodb" --db-host="localhost" --db-user="magentouser" --db-password="password" --language=en_us --currency=usd --timezone=utc --cleanup-database --base-url=http://"magento.example.com"
输出:
[progress: 701 / 706]
installing admin user...
[progress: 702 / 706]
caches clearing:
cache cleared successfully
[progress: 703 / 706]
disabling maintenance mode:
[progress: 704 / 706]
post installation file permissions check...
for security, remove write permissions from these directories: '/var/www/html/magento2/app/etc'
[progress: 705 / 706]
write installation date...
[progress: 706 / 706]
[success]: magento installation complete.
[success]: magento admin uri: /admin_y3asxt
nothing to import.
步骤 4. 为 nextcloud 配置 mariadb。
默认情况下,mariadb 未加固。您可以使用mysql_secure_installation脚本保护 mariadb 。您应该仔细阅读以下每个步骤,这些步骤将设置 root 密码、删除匿名用户、禁止远程 root 登录以及删除测试数据库和访问安全 mariadb 的权限:
mysql_secure_installation
像这样配置它:
- set root password? [y/n] y
- remove anonymous users? [y/n] y
- disallow root login remotely? [y/n] y
- remove test database and access to it? [y/n] y
- reload privilege tables now? [y/n] y
接下来,我们需要登录到 mariadb 控制台并为 magento 创建一个数据库。运行以下命令:
mysql -u root -p
这将提示您输入密码,因此请输入您的 mariadb 根密码并按 enter。登录到数据库服务器后,您需要为 magento 安装创建一个数据库:
mariadb [(none)]> create database magentodb;
mariadb [(none)]> create user 'magentouser'@'localhost' identified by 'your-str0nge-password';
mariadb [(none)]> grant all on magentodb.* to 'magentouser'@'localhost' identified by 'your-str0nge-password' with grant option;
mariadb [(none)]> flush privileges;
mariadb [(none)]> exit;
步骤 5. 为 magento 配置 apache。
现在为 magento 创建一个新的 apache 虚拟主机配置文件:
nano /etc/httpd/conf.d/magento.conf
添加以下行:
 *:80>
serveradmin admin@example.com
servername magento.example.com
documentroot /var/www/html/magento2/
directoryindex index.php
 /var/www/html/magento2/>
options indexes followsymlinks multiviews
allowoverride all
order allow,deny
allow from all

errorlog /var/log/httpd/magento_error.log
customlog /var/log/httpd/magento_access.log combined
保存并关闭文件。重启apache服务使更改生效:
systemctl restart httpd.service
步骤 6. 配置防火墙。
允许防火墙使用 http 和 https 并使用以下命令重新加载它:
sudo firewall-cmd --permanent --zone=public --add-service=http
sudo firewall-cmd --permanent --zone=public --add-service=https
sudo firewall-cmd --reload
步骤 7. 访问 magento web 界面。
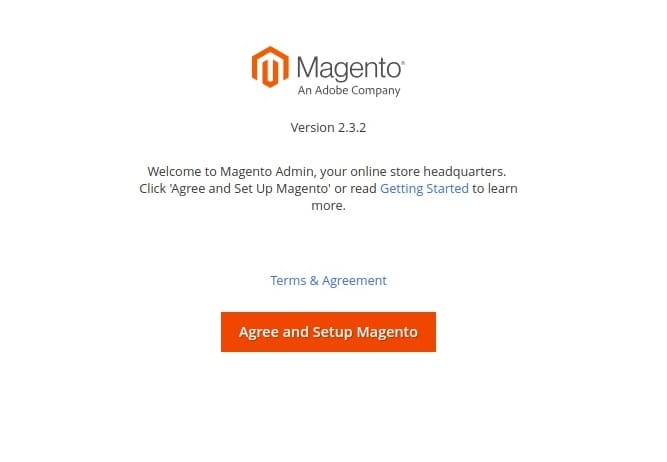
完成逐步安装后,将浏览器导航到您的服务器 url 。您应该会看到以下页面:http://magento.example.com/admin_y3asxt

感谢您使用本教程在您的 almalinux 8 系统上安装 magento 电子商务软件。如需更多帮助或有用信息,我们建议您查看。
原创文章,作者:校长,如若转载,请注明出处:https://www.yundongfang.com/yun2911.html
 微信扫一扫不于多少!
  支付宝扫一扫礼轻情意重